Trailside Repairs: What to Carry and How to Get Home
Something breaks three miles into a trail and suddenly you’re walking. It happens to everyone eventually. The difference between a 20-minute delay and a long hike in cleats comes down to what’s in your bag and whether you’ve practiced using it.
I fix bikes for a living. Most of the “trailside disaster” stories I hear from customers come down to one of two things: they didn’t carry the right stuff, or they carried everything but never learned to use any of it. Both are fixable.
The Kit That Actually Matters
Forget the 47-piece toolkit some forums recommend. You don’t need a spoke wrench for a two-hour ride in the Presidio. Here’s what earns its weight:
Spare tube. Not a patch kit as your primary fix. Patches work, but they work better in your garage with clean hands and good light. On the trail, a fresh tube gets you rolling in five minutes. Carry the patches as backup.
Tire levers. Two of them, plastic. The stamped metal ones that come with cheap kits will gouge your rim tape and give you a second flat before you finish fixing the first one.
Mini pump or CO2. CO2 is faster, but you get one shot. Mess it up and you’re still walking. I carry a mini pump for this reason. It takes longer, but it never runs out. If you go CO2, carry two cartridges and practice at home first. Seriously, the first time you use one should not be trailside with cold hands.
Multi-tool. Get one with hex wrenches (4, 5, 6mm cover most bolts on a modern bike), a Phillips head, and a chain breaker. The chain breaker matters more than people think. A broken chain is rare, but when it happens, there’s no improvising your way out of it.
A quick link. This is the part most people forget. Your multi-tool has a chain breaker, great. You push out the damaged link. Now what? A quick link (also called a master link) reconnects the chain without needing a press fit. They cost about two dollars, weigh nothing, and turn a ride-ending mechanical into a ten-minute fix. Match it to your drivetrain speed (10, 11, 12-speed).
That’s it. Everything fits in a small saddle bag. If you’re riding road or gravel, swap the spare tube size and you’re set.
The Five Fixes You Should Actually Practice
1. Flat Tire
You probably know this one, but “knowing” and doing it smoothly in the dirt are different. The trick most people miss: before you pull the old tube, run your fingers along the inside of the tire. Feel for the thorn, wire, glass, whatever caused the flat. If you don’t find it and remove it, your fresh tube dies in about 400 yards.
Also, when seating the new tube, push the valve stem up into the tire before inflating. This keeps the tube from getting pinched between the tire bead and the rim, which is the number one cause of “I just fixed a flat and got another flat.”
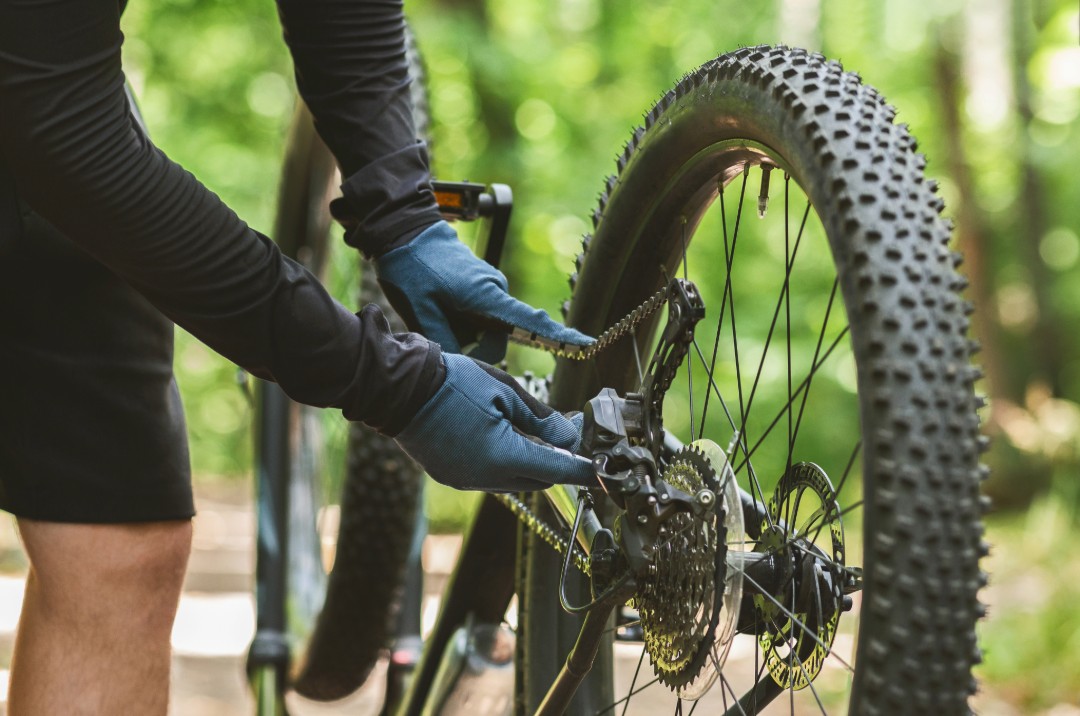
2. Dropped Chain
Chain falls off? Don’t just yank it back on. Shift your front derailleur (if you have one) to the smallest ring, shift the rear to the smallest cog, then guide the chain back onto the chainring by hand while turning the cranks backward. Forcing it back on without adjusting the derailleurs first is how you jam it between the frame and the chainring, and that scratch on your chainstay never buffs out.
3. Brake Rub
You hit a rock, laid the bike down, or your wheel shifted in the dropout. Now your disc brake is rubbing with every rotation. Flip the bike, spin the wheel, and watch where the rotor contacts the pad. If the rotor is visibly bent, you can straighten it with an adjustable wrench or, carefully, with your hands. Grab the rotor only where it’s bent, not the whole thing. Small corrections. Overcorrect and you’ll bend it the other way.
If the rotor looks straight but you still hear rubbing, your wheel probably isn’t seated properly. Pop it out and reseat it, making sure the quick release or thru-axle is fully tightened.
4. Broken Derailleur Cable
Your shifting suddenly stops working and the rear derailleur springs to the smallest cog. The cable snapped. You can still ride home, you just can’t shift. Find the H limit screw on your rear derailleur (it’s usually labeled, or it’s the one closest to the frame). Tighten it until the chain sits on a comfortable middle gear. You won’t be climbing any walls, but you won’t be spinning out on the flats either.
Zip-tie the dangling cable to your frame so it doesn’t catch in the wheel. This is a get-home fix, not a repair. Bring the bike in for a new cable.
5. Broken Chain
This is the one that separates people who ride home from people who walk. Use the chain breaker on your multi-tool to push out the damaged pin and remove the bent or cracked links. Thread the chain back together and connect with your quick link. The chain will be shorter, which means you can’t use your biggest cog anymore, but it’ll get you home.
A word of caution: if your chain breaks twice in the same ride, something else is wrong. Bent derailleur hanger, worn cassette, cross-chaining. Ride easy and get it looked at.
What You Don’t Need (But Forums Will Tell You To Carry)
Spoke wrench. Unless you’re bikepacking for days, a slightly out-of-true wheel will get you home fine.
Spare brake pads. If your pads wear out mid-ride, you weren’t doing pre-ride checks.
Chain lube. A dry chain for a few miles won’t kill anything. Carry lube on multi-day trips, not day rides.
Duct tape. I hear this one a lot. In fifteen years of fixing bikes, I’ve never needed duct tape trailside. A tire boot (a small piece of old tire or a purpose-made patch) is lighter and actually works for sidewall cuts. Duct tape doesn’t hold tire pressure.
The Real Secret
Practice every one of these fixes at home before you need them. Change a tube in your living room. Break and reconnect your chain in the garage. Figure out which way your limit screws turn when there’s no pressure. The trail is a terrible classroom.
And check your kit every couple months. CO2 cartridges don’t expire, but tubes can develop creases and weak spots from sitting folded in a saddle bag. Swap in a fresh tube a couple times a year.
If something breaks that isn’t on this list, or the fix isn’t holding, that’s when you call someone. We do mobile repair across the Richmond, Presidio, and surrounding SF neighborhoods. Sometimes the smartest trailside fix is a phone call.
Presidio Bikes is a mobile bike repair service in San Francisco. We come to you.