When to Fix It Yourself and When to Call a Mechanic
Every cyclist eventually stands over their bike with a YouTube video paused on their phone, a multi-tool in one hand, and a growing suspicion that they’re about to make things worse. Some of the time, they’re wrong. The repair is simple and they save $40. The rest of the time, they’re right, and they show up at a shop with a bike that now has two problems instead of one.
The line between “you can handle this” and “please don’t” isn’t about skill level. It’s about tools, tolerances, and consequences.
Fix it yourself: cable tension adjustments
If your shifting is slightly off, a barrel adjuster turn is all you need in most cases. Quarter-turn counterclockwise to help the chain climb to a bigger cog, clockwise to help it drop. You don’t need any tools beyond your fingers, and getting it wrong just means the shifting stays bad. No damage done.
This is the single most common adjustment we make on service calls, and honestly, half the time we’re just showing riders how to do it themselves next time.
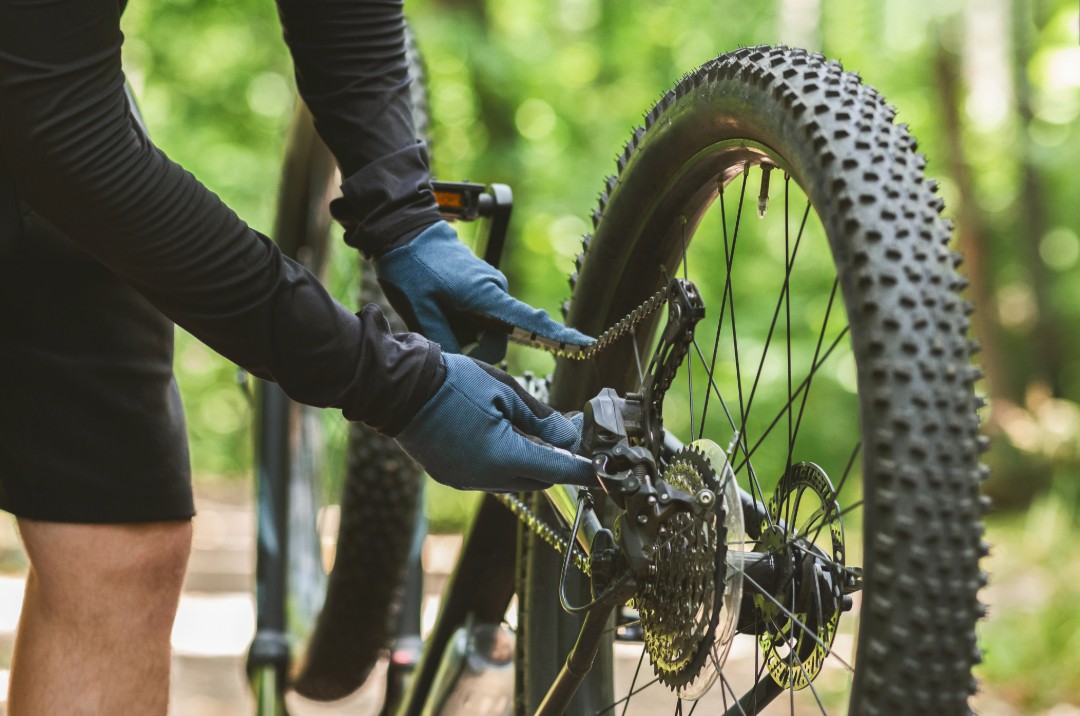
Fix it yourself: chain lubrication
Cleaning and lubing your chain is one of the highest-value things you can do at home. You need a rag, some degreaser, and a bottle of chain lube. Backpedal the chain through the rag to clean it, apply one drop of lube per link, let it soak for five minutes, wipe off the excess. Ten minutes, no special tools, and it dramatically extends drivetrain life.
The key mistake people make: too much lube. A properly lubed chain doesn’t look wet. Excess lube attracts grit, which turns your chain into a grinding compound that chews through the cassette. One drop per link, wipe thoroughly, done.
Fix it yourself: flat tire repair
Tube replacement is the foundational bike repair skill. If you ride regularly and can’t swap a tube, you’re one piece of broken glass away from a very long walk. The process is straightforward: remove the wheel, unseat one side of the tire with tire levers, pull the old tube, check the tire for whatever caused the flat, install a new tube, inflate, reinstall the wheel.
Where people get tripped up: not finding the cause. If a thorn or piece of wire is still embedded in the tire, the new tube will puncture within a mile. Run your fingers along the inside of the tire before putting the new tube in. Carefully, since whatever popped the first tube can cut your finger too.
Fix it yourself: brake pad replacement
Rim brake pads are genuinely easy. Bolt out, bolt in, adjust toe-in so the front of the pad hits the rim first. Disc brake pads are slightly trickier but still DIY-friendly on mechanical disc brakes. Pop the wheel out, slide the old pads out, push the pistons back with a tire lever or flat-head screwdriver, slide new pads in.
Hydraulic disc brake pads follow the same basic process, but with one caution: don’t squeeze the brake lever while the wheel is out. The pistons will push together with nothing between them, and getting them apart again requires bleeding the system.
Call a mechanic: derailleur hanger alignment
A bent derailleur hanger is one of the most common causes of bad shifting that a barrel adjuster can’t fix. The hanger is a small aluminum piece between the frame and derailleur, designed to bend on impact so your frame doesn’t. The problem: you can’t reliably straighten it by eye. It needs a derailleur alignment gauge, which is essentially a long lever that magnifies tiny bends so they become visible.
Attempting to straighten a hanger by feel usually gets it close but not right. Close-but-not-right shifting is maddening. It works in half the gears and skips in the others. A proper alignment takes about five minutes with the right tool.
Call a mechanic: wheel truing
A wobbly wheel looks like it should be fixable with a spoke wrench and some patience. And technically it is. But wheel truing is one of those skills where the gap between “sort of true” and “properly true” is the difference between a weekend of frustration and 30 seconds of professional work.
Each spoke affects the ones next to it. Tightening one spoke to fix a wobble in one spot creates a new wobble two spokes over. Without a truing stand that shows exactly where the deviation is, you’re chasing problems around the wheel. Home mechanics frequently over-tension individual spokes trying to fix lateral wobble, which creates radial hops and weakens the rim at stress points.
If you want to learn wheel truing as a skill, buy a truing stand ($70-150 for a decent one) and practice on a spare wheel. Don’t learn on a wheel you need to ride tomorrow.
Call a mechanic: hydraulic brake bleeds
When hydraulic disc brakes get spongy or the lever pulls to the bar, there’s air in the line. Bleeding hydraulic brakes means pushing fresh fluid through the system to force the air out. Every brake brand uses a slightly different procedure, different fluid (Shimano uses mineral oil, SRAM uses DOT fluid, and they are absolutely not interchangeable), and different bleed port configurations.
Getting it wrong ranges from “brakes still feel spongy” to “contaminated pads that need replacement” to “DOT fluid on your paint, which strips it.” This is skilled work that takes a mechanic 15-20 minutes and takes a first-timer an afternoon of increasingly anxious YouTube watching.
Call a mechanic: bottom bracket service
The bottom bracket is the bearing assembly where the cranks pass through the frame. When it wears out, you feel a creak or grinding at the pedals. Replacing it requires specific tools for your BB standard (and there are at least eight different standards in common use), correct torque specs, and proper facing and chasing of the frame threads.
A bottom bracket installed without thread prep or at wrong torque can creak worse than the one it replaced, or seize into the frame over time. Neither outcome is fun.
The expensive middle ground
Some repairs fall in between. You could buy the tool and learn the skill, or you could pay a mechanic and save yourself the learning curve. The question is whether you’ll use that tool enough to justify the cost.
A chain checker ($15) pays for itself on the first use. A cable cutter ($25-40) makes sense if you replace cables once a year. A torque wrench ($40-80) is essential if you ride carbon. A truing stand ($100+) only makes sense if you’re building or maintaining multiple wheels.
The honest math: if a tool costs more than three mechanic visits for that specific repair, and you’ll only use it once or twice, let the mechanic do it.
The real cost of getting it wrong
The worst DIY outcomes aren’t stripped bolts or wasted afternoons. They’re safety failures you don’t notice until you’re descending at speed. An improperly torqued stem that shifts mid-ride. A brake that seems fine in the driveway but fades on a real hill. A quick-release that wasn’t fully seated.
If a repair touches your steering, your brakes, or your wheel attachment, double-check your work. Or better yet, have someone experienced verify it. This isn’t about gatekeeping. It’s about the fact that bikes go fast and riders are soft.
Presidio Bikes is a mobile bike repair service in San Francisco. We handle the repairs that need proper tools and come to your location for tune-ups, adjustments, and everything in between.
Text or call (415) 723-8600 to book same-day service.